Install CubeBuilder Service
Thank you for choosing CubeBuilder. This guide will walk you through the process of deploying the service on your on-premises resources or cloud providers.
Warning
Our database structure has been significantly updated. A clean installation is required as previous databases are not compatible.
Prerequisites
Before beginning the installation, ensure you have the following:
Docker
Required for orchestrating the CubeBuilder service.
Installation instructions: https://docs.docker.com/engine/install/
AWS account
Necessary for validating access to our privately distributed images.
You’ll need to provide us with: * Your AWS account ID * IAM username (if not using a root user)
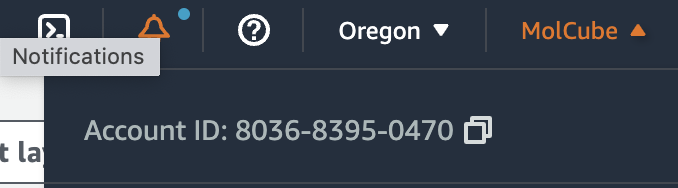
Find your AWS account ID in the upper right corner of the AWS web console.
Workstation or a cloud instance
Recommended: 8 cores, 16 GB memory (e.g., AWS c5.2xlarge or c5a.2xlarge)
Note: Larger membrane structures may require more memory.
AWS Commandline Interface (CLI)
Install and configure: https://docs.aws.amazon.com/cli/latest/userguide/getting-started-install.html
Installation
Step 1: Prepare the Environment
Please download the latest version here.
If you need access to a previous version, please contact us at support@molcube.com.
Extract and place the files on your target instance.
Warning
We recommend running this service on an instance not directly connected to the internet. Use a VPN or private network for access.
Ensure the instance has a web-accessible IP address and that users can reach port 80.
Step 2: Configure the Environment
Edit the .env.prod file:
Update server address and web host name.
Example (for IP 192.168.0.1 and hostname molcube.acme.com):
# Edit Secret Key with Random String
SECRET_KEY=FtbizrXOUPiyEKDJkPZOttmFGnjiyhgaUVWUjfGm

# Web host names and port number
ALLOWED_HOSTS="192.168.0.1 molcube.acme.com"
NGINX_HOST="192.168.0.1 molcube.acme.com"
NGINX_PORT=80

# User signup configuration: change to "mandatory" to require users to
# confirm email before signing in. Set it as "optional" to send confirmation
# emails but not require them. If this is set as "none", no action is taken
# upon user signup.
ACCOUNT_EMAIL_VERIFICATION=none

DJANGO_SETTINGS_MODULE=molcube.settings_onprem
Step 3: Authentication and Initialization
Authenticate to AWS
make auth
This grants your AWS account access to MolCube’s image repository.
Initialize service
make init
This retrieves images and sets up the services. (Only required for initial setup)
Step 4: Start the Service
Start Service
make start
Verify the installation by accessing http://<your-server-address> in a web browser.
Note
The service currently only supports HTTP. Some browsers may automatically attempt HTTPS, so explicitly use http:// in the address bar if needed.
Step 5: Create Admin Account
Create superuser account
make createsuperuser
Enter an email address as the username and create a strong password.
Access the admin panel at http://<your-server-address>:8000/admin
Updating the Service
[Important Steps] When Creating Users after logging in Admin Page
Please follow these steps carefully when setting up users:
1. Add a Custom User
Navigate to [Home] > [Users] > [Custom users]
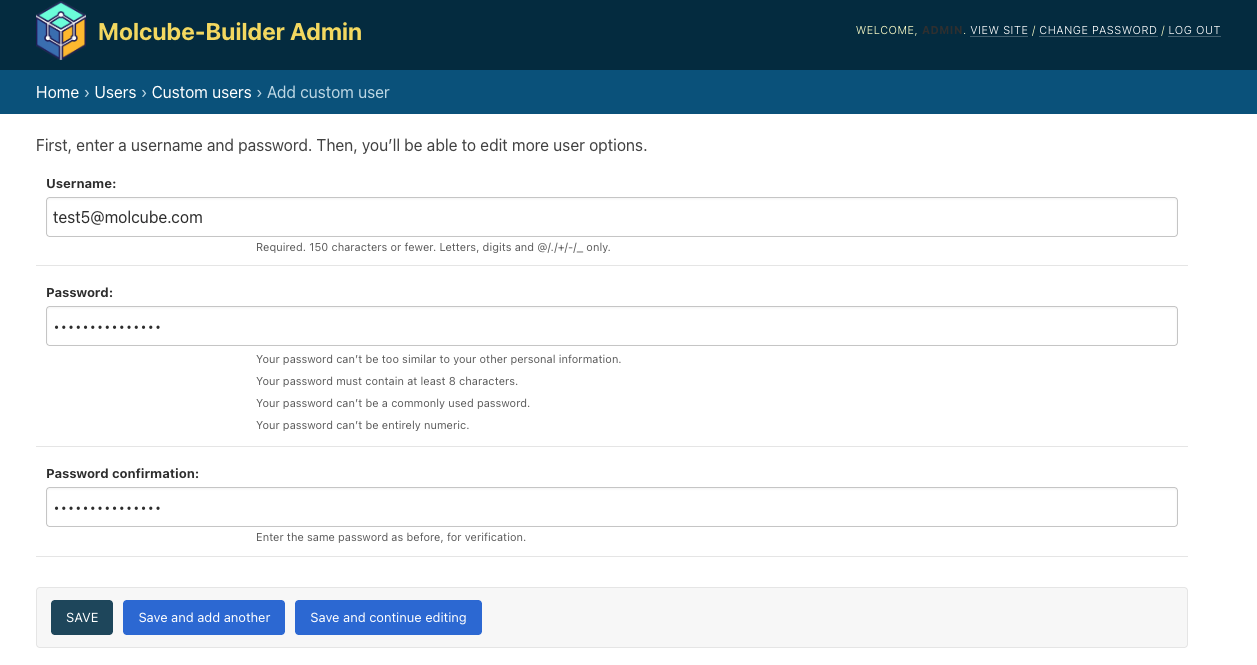
Click the “Add custom user” button
Fill out the basic fields and click Save
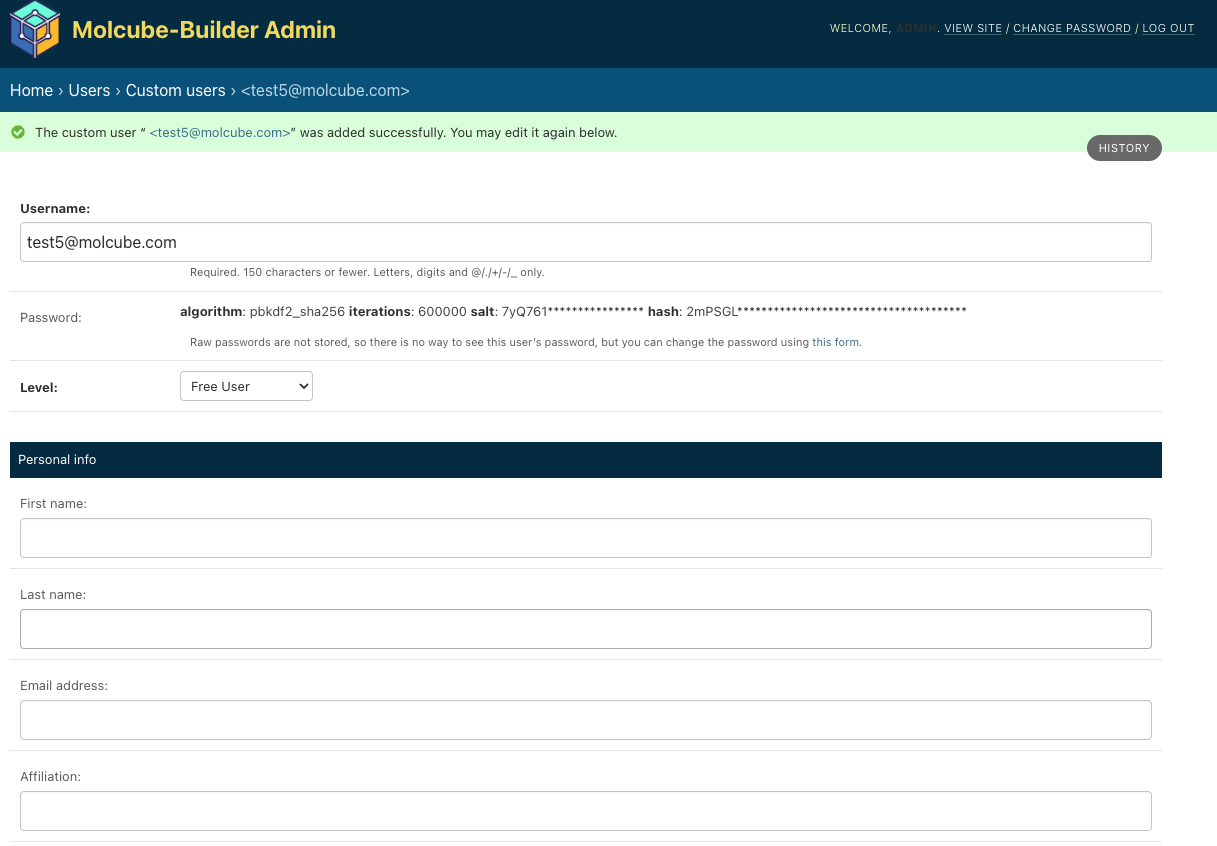
2. Fill in Personal Information
After saving, fill in the following fields under “Personal Info”:
First Name / Last Name / Email Address / Affiliation
Click Save again
Note: Remember the exact email address you entered here
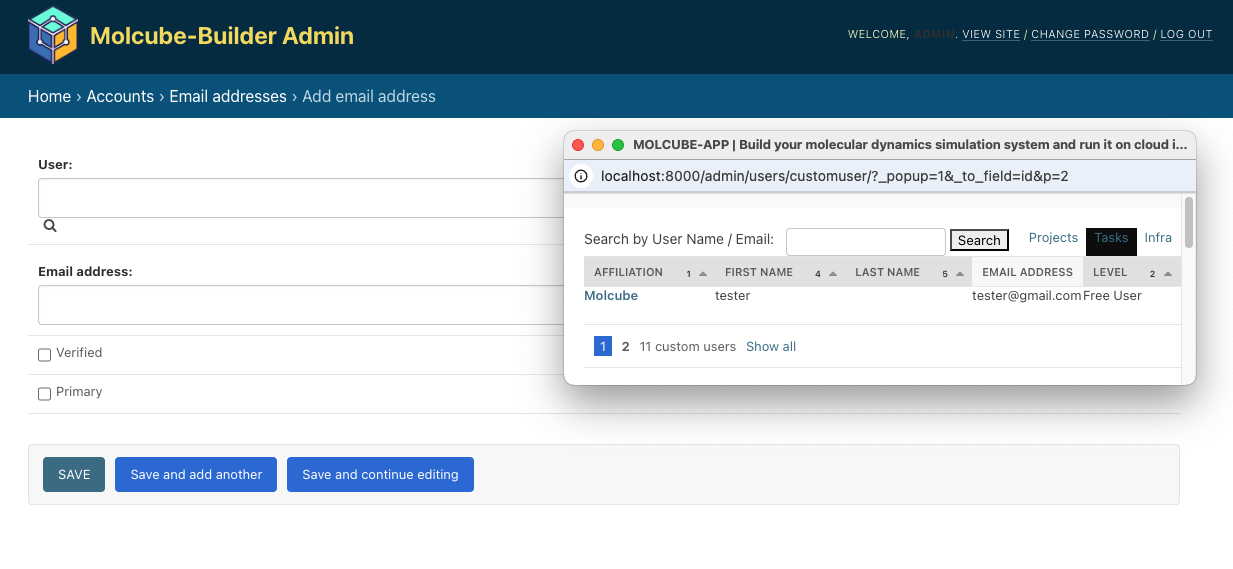
3. Register the Email Address at Accounts
Go to [Home] > [Accounts] > [Email addresses]
Click “Add Email Address” (top right)
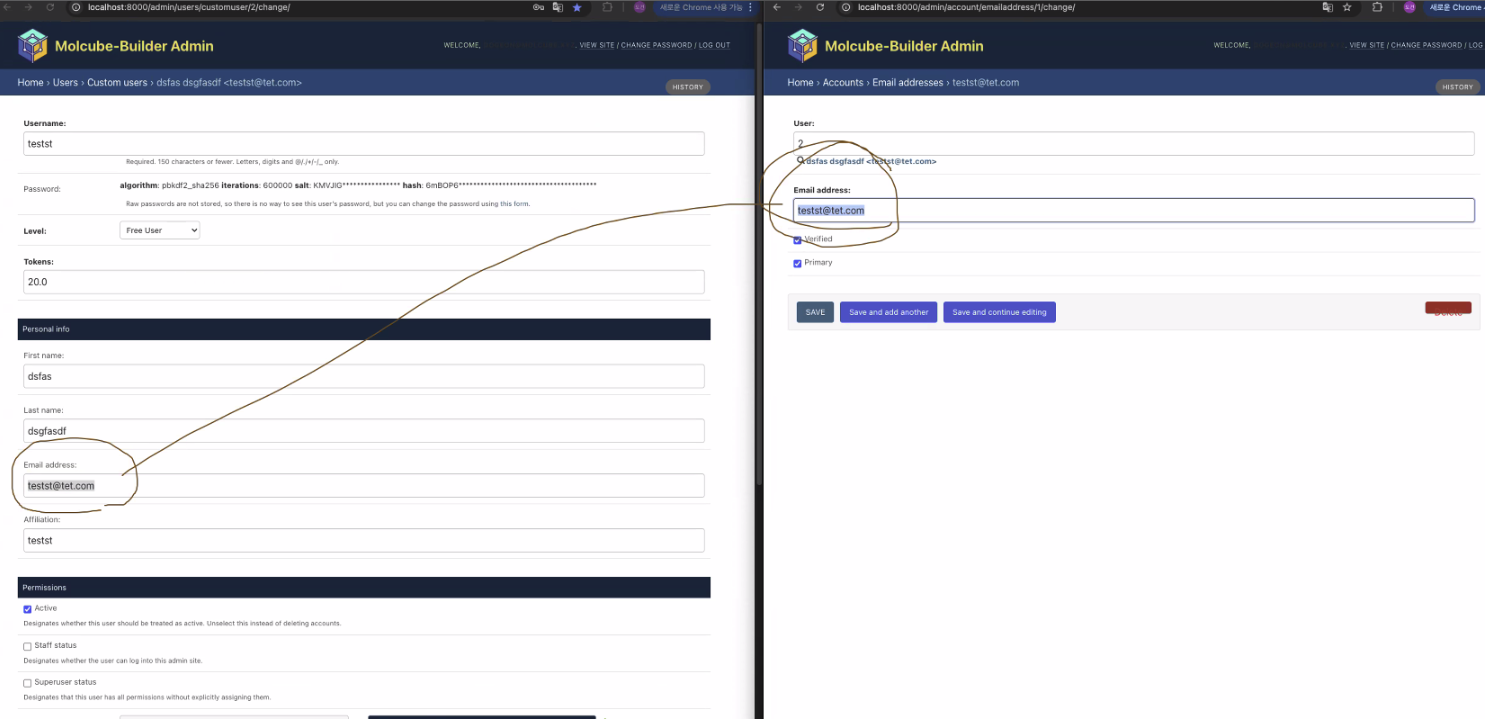
In the pop-up window, click the magnifying glass icon
Select the user you just added
Enter the same email address you used in step 2
Check the boxes for “Verified” and “Primary”
Click Save
4. Troubleshooting Login Issues
4.1. If the user is unable to log in:
Double-check that the email address in both [Users] > [Custom users] and [Accounts] > [Email addresses] are identical.
To update CubeBuilder:
Re-authenticate with AWS:
make auth
Update the service:
make update
Database Management
1. Reset the database
If you need to clean a previous database:
Back up project data files by running
./files-backup.sh
Reset the database:
docker compose exec db dropdb -U postgres molcube
docker compose exec db createdb -U postgres molcube
2. Use a different database
If you want to use other database(e.g., other local database, AWS RDS), you can change the database configuration.
Add your database configuration in the .env.prod file.
DB_NAME=molcube
DB_USER=postgres
DB_PASS=postgres
DB_HOST=xxxxx.rds.amazonaws.com
DB_PORT=5432
Delete the db service and other related configurations from the docker-compose.yml file, as shown below:
2.1. delete the db service.
services:
   db:
      image: postgres:14
      # persistent storage
      volumes:
         - postgres_data:/var/lib/postgresql/data/
      ports:
         - "5432:5432"
      environment:
         - POSTGRES_DB=molcube
         - POSTGRES_USER=postgres
         - POSTGRES_PASSWORD=postgres
2.2. delete the db configuration from the web and celery services.
services:
   web:
      ....
   db:
      condition: service_started

services:
   celery:
      ....
   db:
      condition: service_started
Or you can just replace the docker-compose.yml file with the one below:
version: "3.9"

services:
rabbitmq:
   image: 'rabbitmq:3.11-management'
   ports:
      - '5672:5672'
      - '15672:15672'
   environment:
      RABBITMQ_DEFAULT_USER: molcube
      RABBITMQ_DEFAULT_PASS: molcube1234
      # RABBITMQ_LOG_LEVEL: warning # default : info
      # RABBITMQ_DEFAULT_VHOST: / # default : /

   volumes:
      - ./rabbitmq.conf:/etc/rabbitmq/rabbitmq.conf

   healthcheck:
      test: ["CMD", "rabbitmq-diagnostics", "check_port_connectivity"]
      interval: 10s
      timeout: 5s
      retries: 5

flower:
   build:
      context: .
      dockerfile: ../flower/Dockerfile
   ports:
      - "5555:5555"
   environment:
      # - CELERY_QUEUES="celery,slack_bot_queue"
      - CELERY_BROKER_URL=amqp://molcube:molcube1234@rabbitmq:5672//
      # - CELERY_RESULT_BACKEND=rpc:// # is it need?
      - FLOWER_UNAUTHENTICATED_API=true
   depends_on:
      rabbitmq:
         condition: service_healthy

nginx:
   image: nginx
   volumes:
      - ./nginx:/etc/nginx/templates
      - ./frontend:/staticfiles
   ports:
      - "80:80"
   env_file:
      - ./.env.prod
   depends_on:
   - web

web:
   image: 803683950470.dkr.ecr.us-west-2.amazonaws.com/molcube/web:2025.1.0
   volumes:
      - $HOME/.aws:/root/.aws:ro
      - app_data:/data
   command: gunicorn --bind 0.0.0.0:8000 --workers 8 --threads 1 --timeout 0 molcube.wsgi:application
   ports:
      - "8000:8000"
   env_file:
      - ./.env.prod
   depends_on:
      rabbitmq:
         condition: service_healthy
   tty: true

celery:
   image: 803683950470.dkr.ecr.us-west-2.amazonaws.com/molcube/web:2025.1.0
   volumes:
      -  $HOME/.aws:/root/.aws:ro
      - app_data:/data
   command: ./scripts/start_celery_multi.sh
   env_file:
      - ./.env.prod
   depends_on:
      rabbitmq:
         condition: service_healthy

volumes:
postgres_data:
redis_data:
app_data:
Restart the service
make stop
make start
For any issues or additional support, please contact our techincal support team or leave your comment on our customer portal
Enable HTTPS
To enable HTTPS for Molcube OnPrem version installed on AWS, follow these steps after installing the solution on EC2 Instance.
Note
By using an AWS-provided certificate with ALB, you don’t need to install the certificate directly on your EC2 instance. The ALB handles the SSL/TLS termination, and your EC2 instance can continue to serve HTTP traffic internally
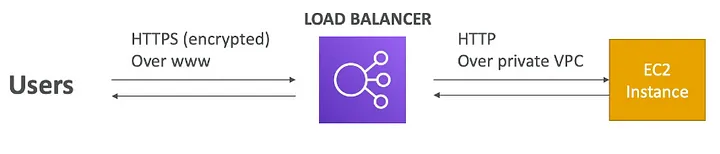
For the best result, consult with your company’s network administrator to ensure proper configuration and compliance with internal security policies.
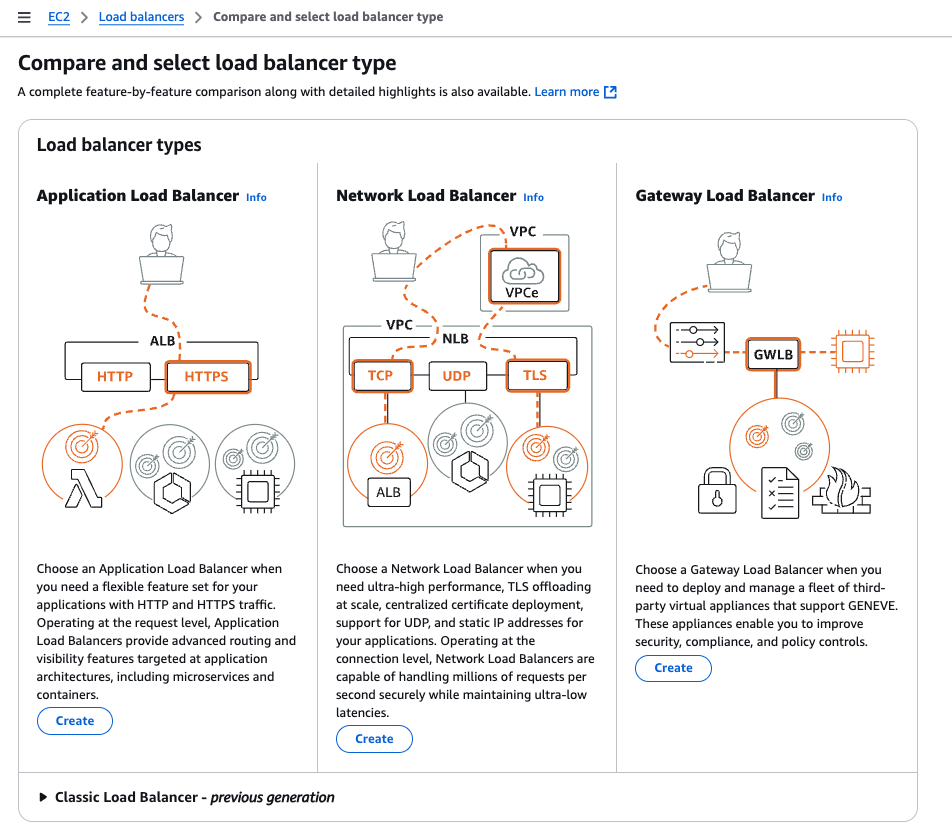
Step 1. Create an Application Load Balancer (ALB)
Open the EC2 console and navigate to “Load Balancers”
Click “Create Load Balancer” and select “Application Load Balancer”.
Configure the load balancer:
Type the Load balancer name
Choose internal (If you need public IP address, choose internet-facing)
Select your VPC and at least two subnets (Choose the default VPC or any preferred one; consult your network manager if needed.)
Configure security groups to allow HTTPS traffic (port 443)
A security group is a set of firewall rules that control the traffic to your load balancer. Select an existing security group
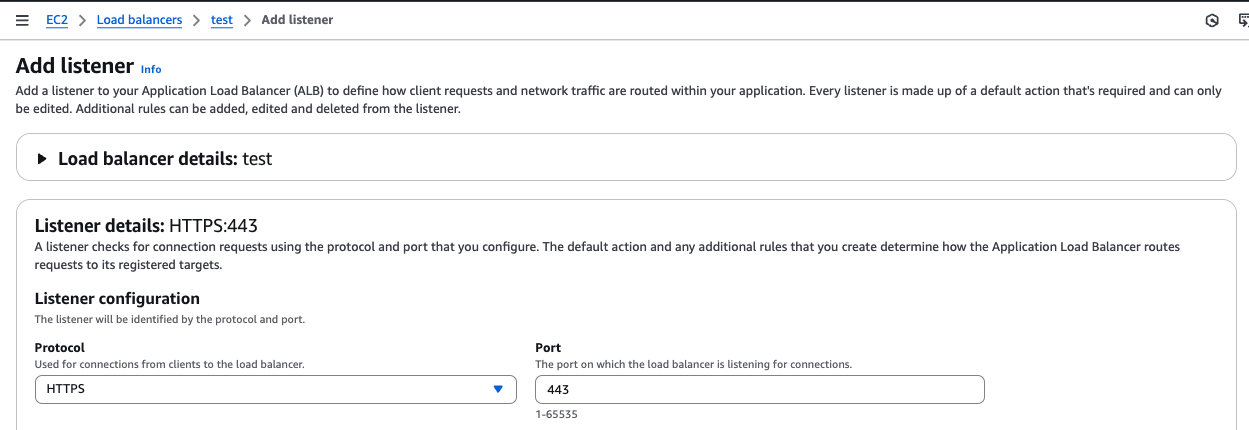
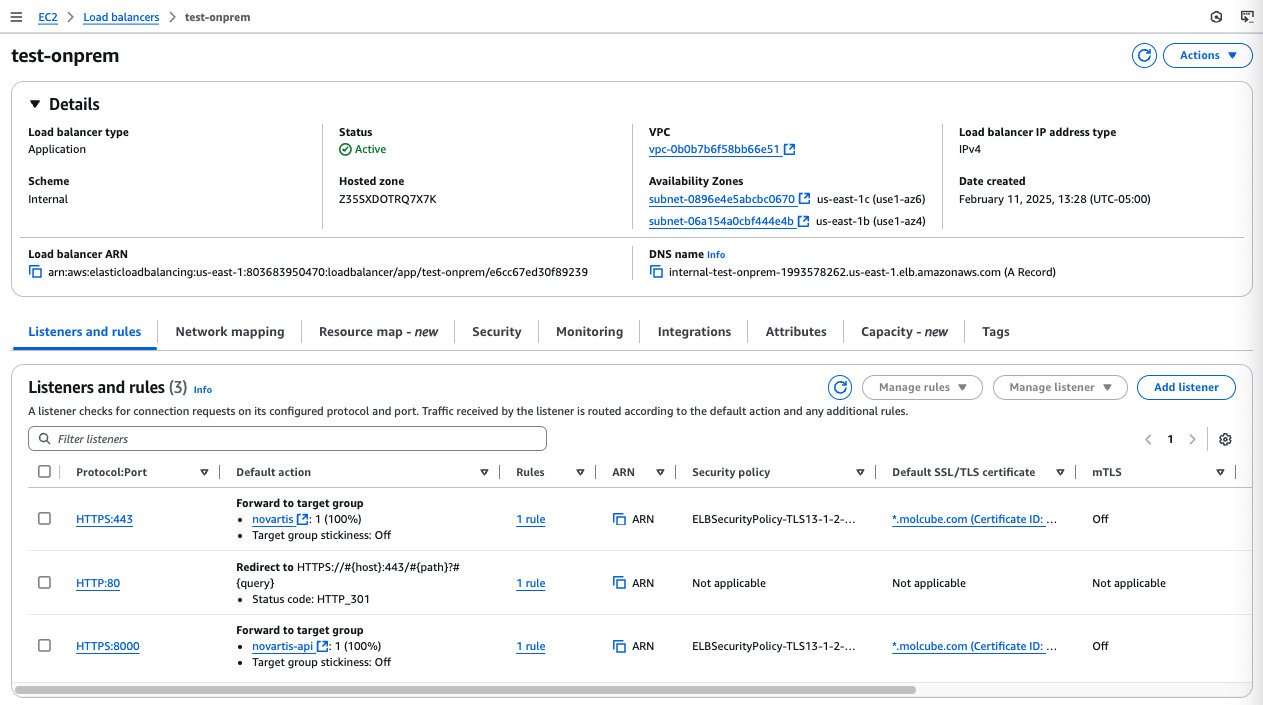
Step 2. Add HTTPS Listener to ALB
In the load balancer configuration, add a listener for HTTPS (port 443)
Select the ACM certificate you created earlier.
Configure the routing to your EC2 instance and port number 80.
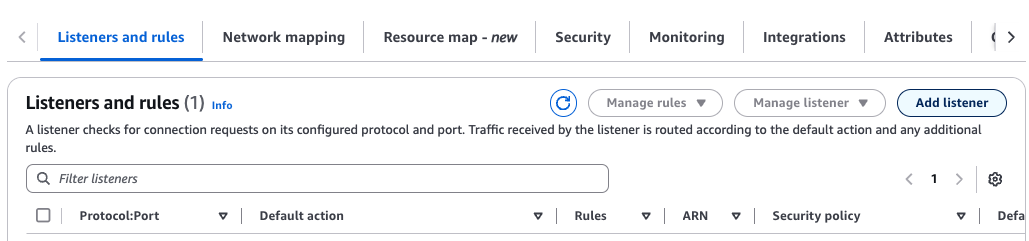
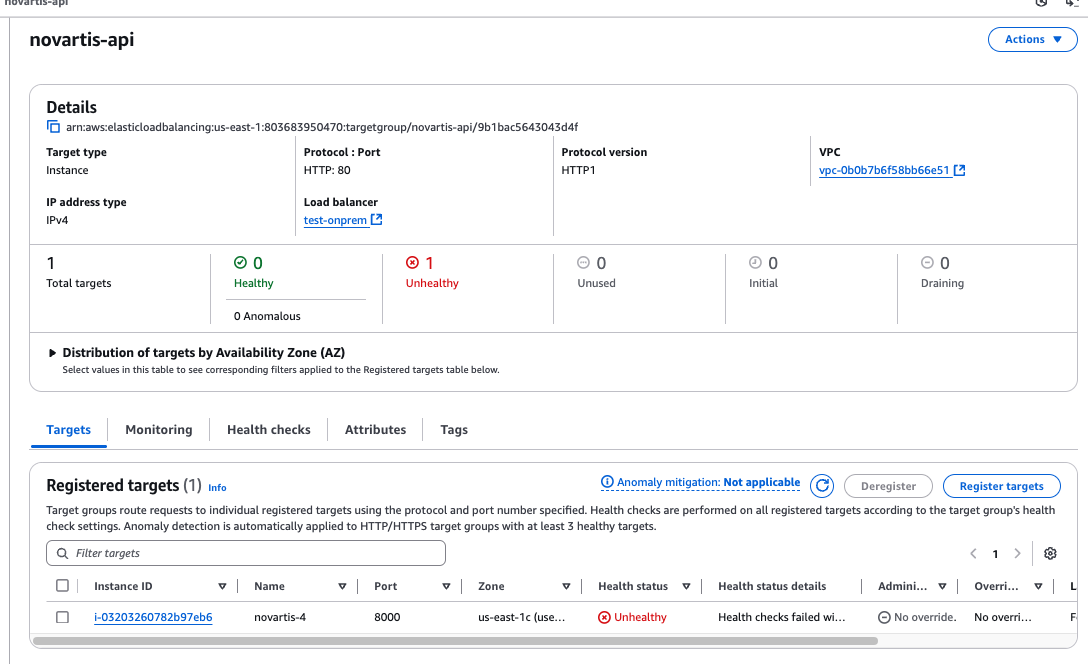
For admin access, you also need to add another target group for https:8000 which forwards to 8000 port to the same server.
Healthcheck can be ignored
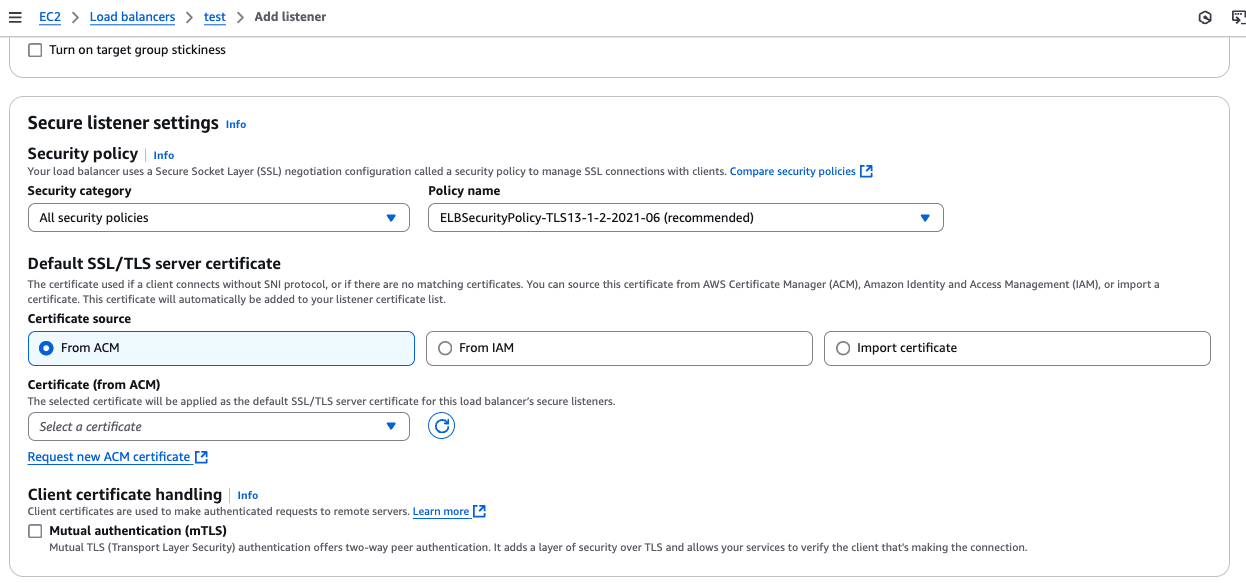
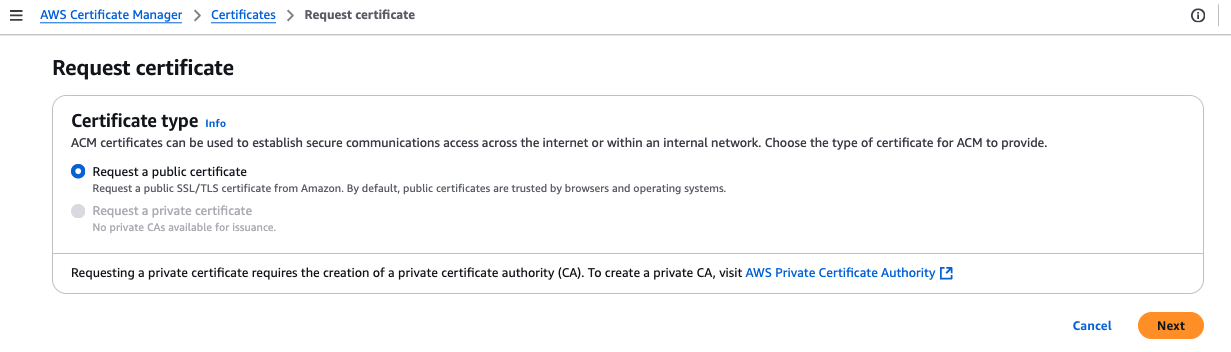
Step 3. Request an SSL Certificate from AWS Certificate Manager (ACM)
Choose From ACM and click “Request new ACM certificate”. This will open the AWS Certificate Manager console. a. If you have existing Amazon certificate, select it. b. If you want to your certificate, select “Import certificate”
Click “Request a certificate” and choose “Request a public certificate”.
Enter your domain name and follow the prompts to validate ownership.
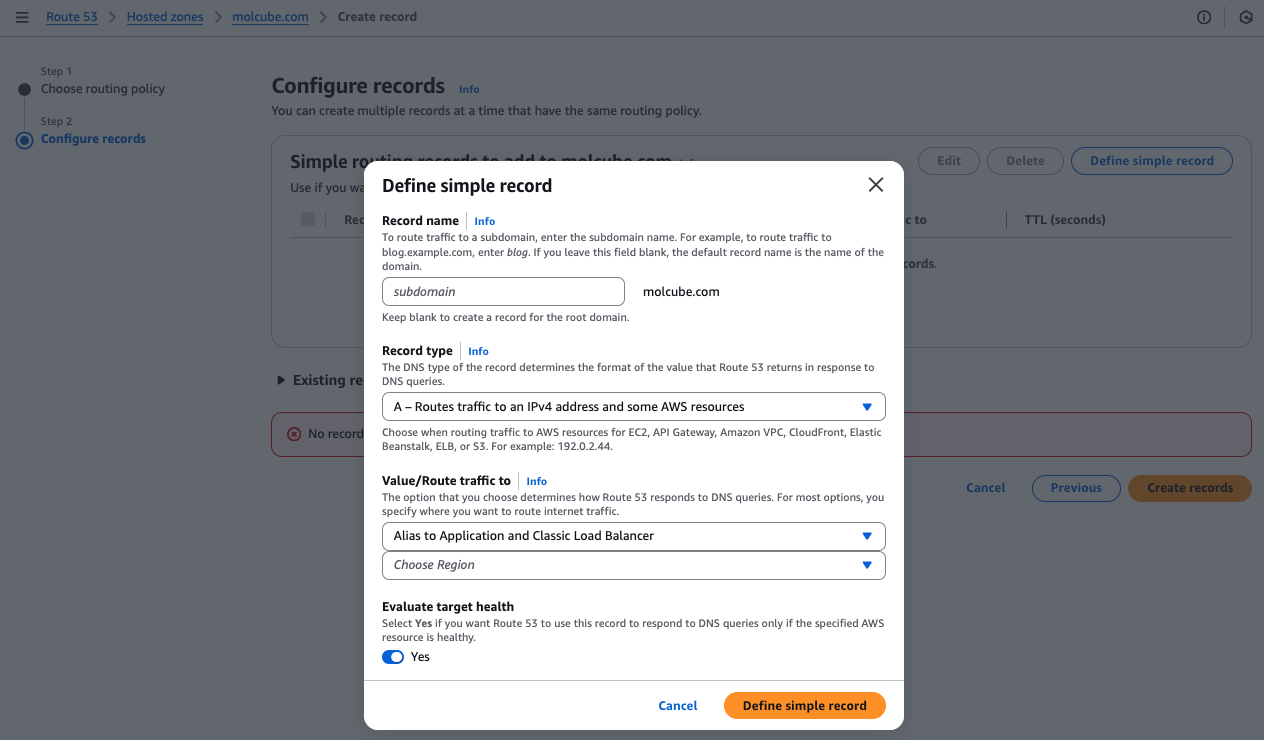
Step 4. Update DNS Records
Update your domain’s DNS records to point to the ALB’s DNS name.
Navigate to AWS Route 53 Hosted Zones
Click “Create record”
Select A Record type with Alias to Application and Classic Load Balancer
Choose the correct AWS region
Select the previously created load balancer from the list
Step 5. Test HTTPS Connection
Access your website using https:// in front of the domain name to verify the secure connection is working.
Trouble Shooting
Case 1. When the progress bar is stuck on ‘Waiting for progress…’
may occur on the Rocky Linux 9 Operating System.
Go to molcube directory.
Run command
# Run Command 1
make start && docker exec -it molcube-celery-1 bash

# Run Command 2
cd ./scripts

# Run Command 3
cat << 'EOF' > start_celery_multi.sh
#!/bin/bash
echo "Received arguments: \$@"
mkdir -p /data/celery/run /data/celery/log
touch /data/celery/log/temp.log
find /data/celery/run -type f -name '*.pid' -delete
export TERM=xterm
until
  celery -A molcube worker -n base -Q base_queue -c 48 -l INFO --pidfile=/data/celery/run/base.pid --logfile=/data/celery/log/base.log &
  celery -A molcube worker -n group -Q group_queue -c 4 -l INFO --pidfile=/data/celery/run/group.pid --logfile=/data/celery/log/group.log
do
echo "Worker crashed with exit code $? - restarting...";
sleep 1;
done &
tail -f /data/celery/log/*.log
EOF


# Run Command 4
exit

# Run Command 5
docker compose up -d